
👋🏻 Welcome to my new blog and site 👋🏻
This is my first blog post for my website 🤞. I wanted to start the blog with writing about building this site but if you search for ‘Building your Gatsby site’, there are loads of blog posts written by developers about their process. I wanted to take a different slant and focus on my journey to learning to code.
I recommend these resources. They helped me build this site.
- Gatsby.org site is great and has loads of really good tutorials on how to start building a site with Gatsby.
- LevelUp Tutorials was the main resource for me to understand Gatsby they are great and really easy to follow.
- I found this post really useful to understand how to get images to work.
Three years ago I had little understanding of how to code but working closely with developers at ustwo I started to understand the principles of development. This made me want to learn more. I took a course in front-end development at General Assembly and this really gave me the grounding to start building things.
After getting a taster of development and the fact my personal website was non-existent I decided to build my first portfolio site from scratch. Let’s say my first site was basic but it worked. You can read more about it on my Medium post
The problem with this site was it was a pain to make changes to. The site was hard-coded so if I wanted to make a change I would have to do it on every page; nothing was built programmatically. It did its job but it was time for it to be retired.
Fast forward to today (well actually about 4 months ago) I decided to embark on building a new site. There were some driving factors to this; some new projects that I want to show, I want to focus more on the process and learnings and less on the visual output and finally, I wanted to challenge my technical understanding.
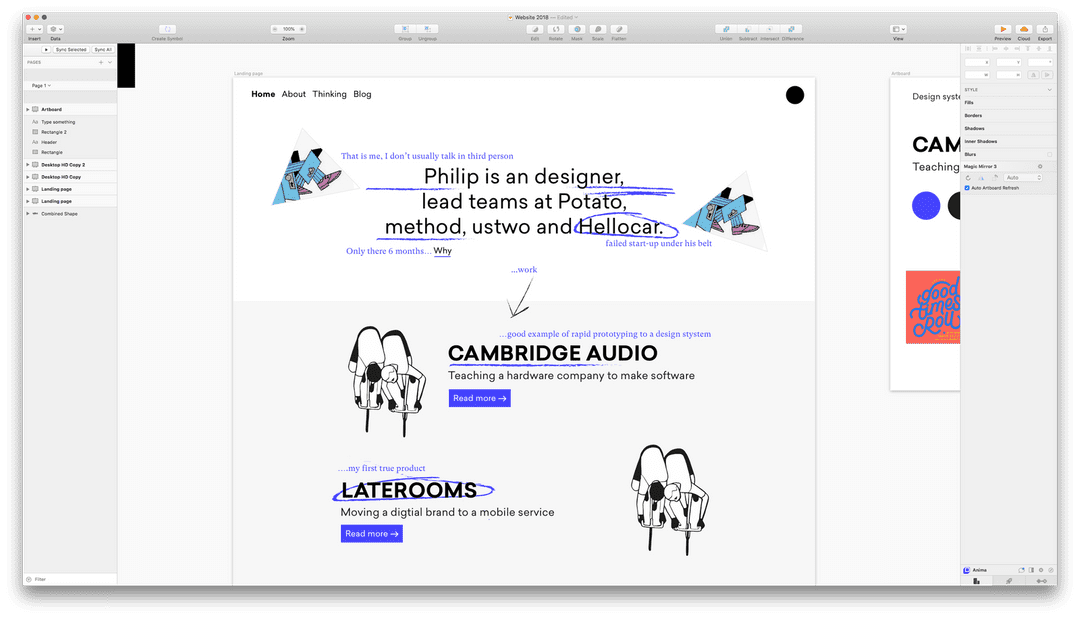
My first step was to whip up a design. I wanted to create a lean system as I know I refine it within the browser anyway. The design system was simple: 3 colours, two typefaces (Saliec and GT-Super) and the 'doodle design element'.
The next step was to decide on what tech stack to use and this is when I stumbled upon 😍Gatsby😍. In a nutshell Gatsby builds your website from your data source (markdown, CMS etc) and using a bunch of cool features to make your life easier. Gatsby builds the site using the React framework. I had a basic understanding of react and this project allowed me to take my understanding further.
Gatsby allows you to host and deploy on whatever platform you want. I used Netlify to do the deployment; Netlify then connects to a Github repo so when you push to master (or whatever your repo is) it triggers a deployment to the live site. Netlify also has a bunch of cool features that means that you don’t need to actually programme (which is my favourite way to do development😜). The Contact us form is powered by Netlify so I did not have to build any logic or backend to store the user's details.
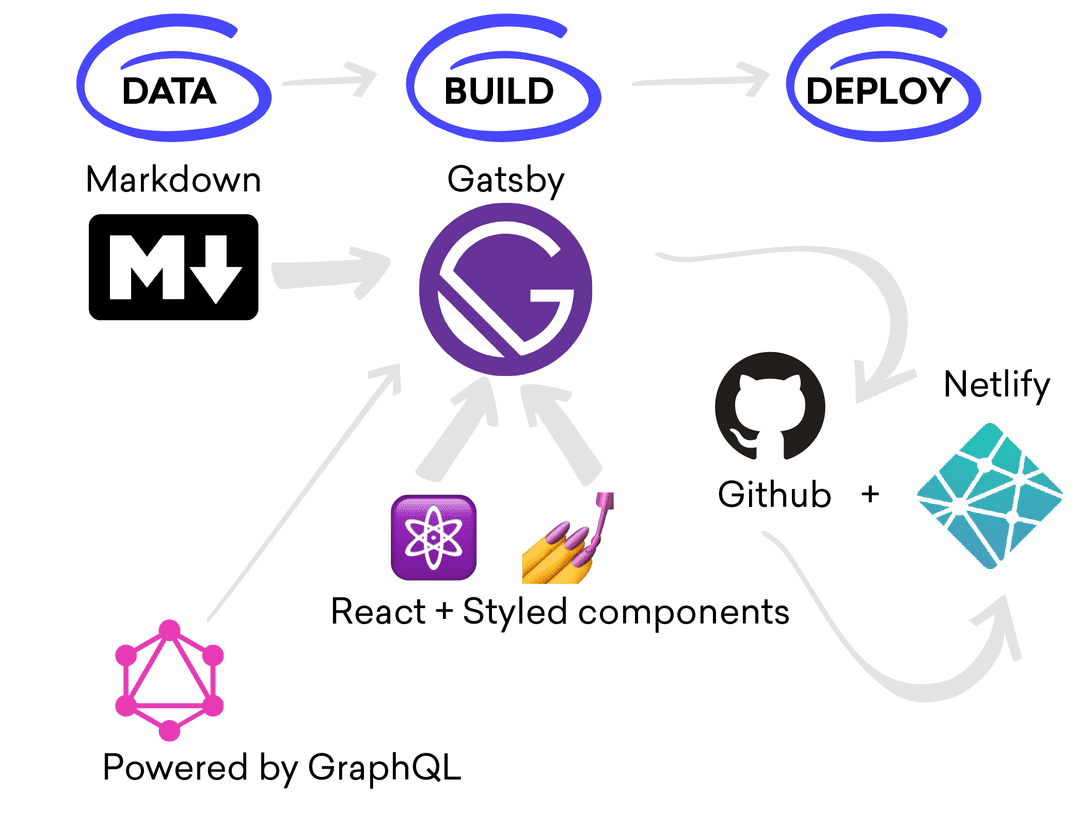
The next part is GraphQL 🤓 which has been the hardest part to get my head around. If you want to use information from your data source (markdown) and use it on your site you need to run queries on that data to render it on the page. GraphQL lets you run these queries in real-time and also allows you to apply API’s to affect that data.
This is an example of GraphQL query I am running on the about page.
query AboutByPath($id: String!) {
  markdownRemark(id: { eq: $id }) {
    html
    frontmatter {
      path
      title
      templateKey
      cover_image {
        childImageSharp {
          fluid(
            maxHeight: 1200
            duotone: { highlight: "#4644FD", shadow: "#222172", opacity: 65 }
          ) {
            ...GatsbyImageSharpFluid
          }
        }
      }
    }
  }
}
This is a breakdown of the query, specifically cover_image.
cover_image {
        childImageSharp {
          fluid(
            maxHeight: 1200
            duotone: { highlight: "#4644FD", shadow: "#222172", opacity: 65 }
          ) {
            ...GatsbyImageSharpFluid
In this part of the query, I am pulling cover_image from my markdown for the about page. (Example of the Markdown cover_image: "phil-3.jpg").This is an image file that I have declared in the markdown with the actual image asset stored in the same folder. Next, I am asking the query to use a plugin to run some tasks on that query. I want to scale the image for breakpoints and also place a colour overlay on the image. To do this I want to expose several image processing GraphQL functions built on the Sharp image processing library using the plugin gatsby-transformer-sharp. Firstly Fluid function, which means my image will be resized for different breakpoints, and on the image I run ‘duotone’, which will apply a colour overlay. If you want to learn more about gatsby-transformer-sharp read this
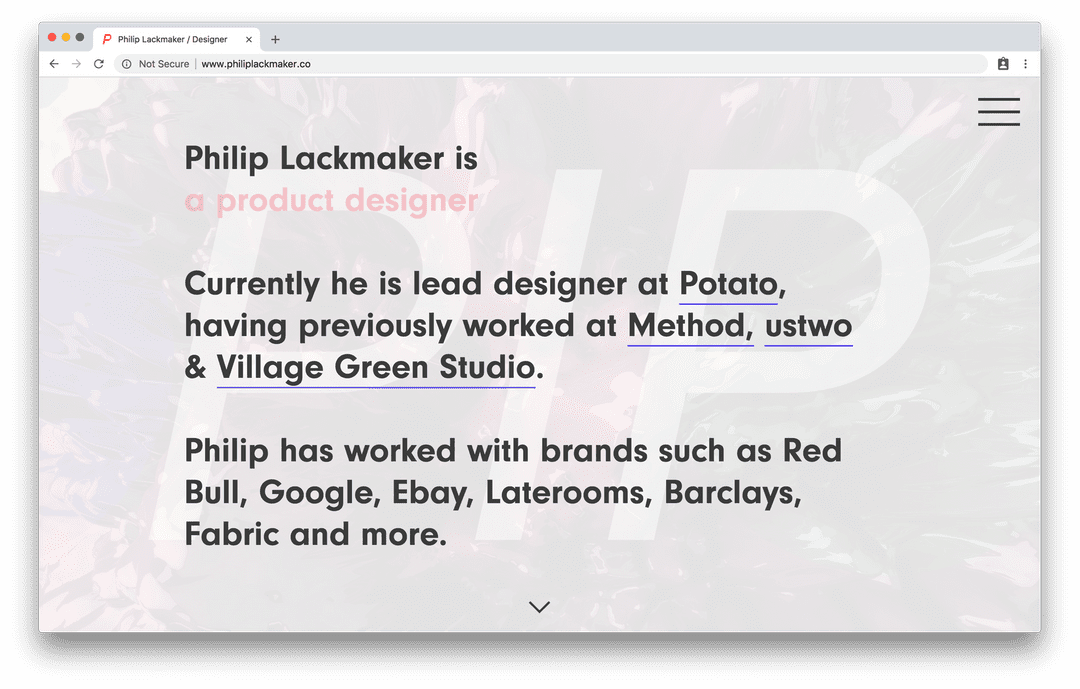
Final result! The image is now scaled to my different breakpoints and is also coloured.
Next up is to tackle my backlog which I will cover in another post.
My backlog as it stands
- Build the Blog landing page.
- Build new functionality on the blog, Social, Comments, Tags.
- Re-design the "Approach' page.
- Build the presenter mode.
- Add Global search to the site
- Write more blog posts.
 (Illustration by Mr Bingo)